Thursday, September 29, 2011

Albuera

From Elvas to Albuera, (La Albuera), through Badajoz, it is mostly flat or low rolling countryside.
 The village of Albuera itself is a small affair, with a solitary square and renaissance church, and a single road leading down to the original bridge. A new highway and ring road has just opened which bypasses the centre. Thankfully this new road hasn’t altered the battlefield, but it is quite close…

The village appears much as it probably did in 1811 (minus the asphalt and eletric wires of course)
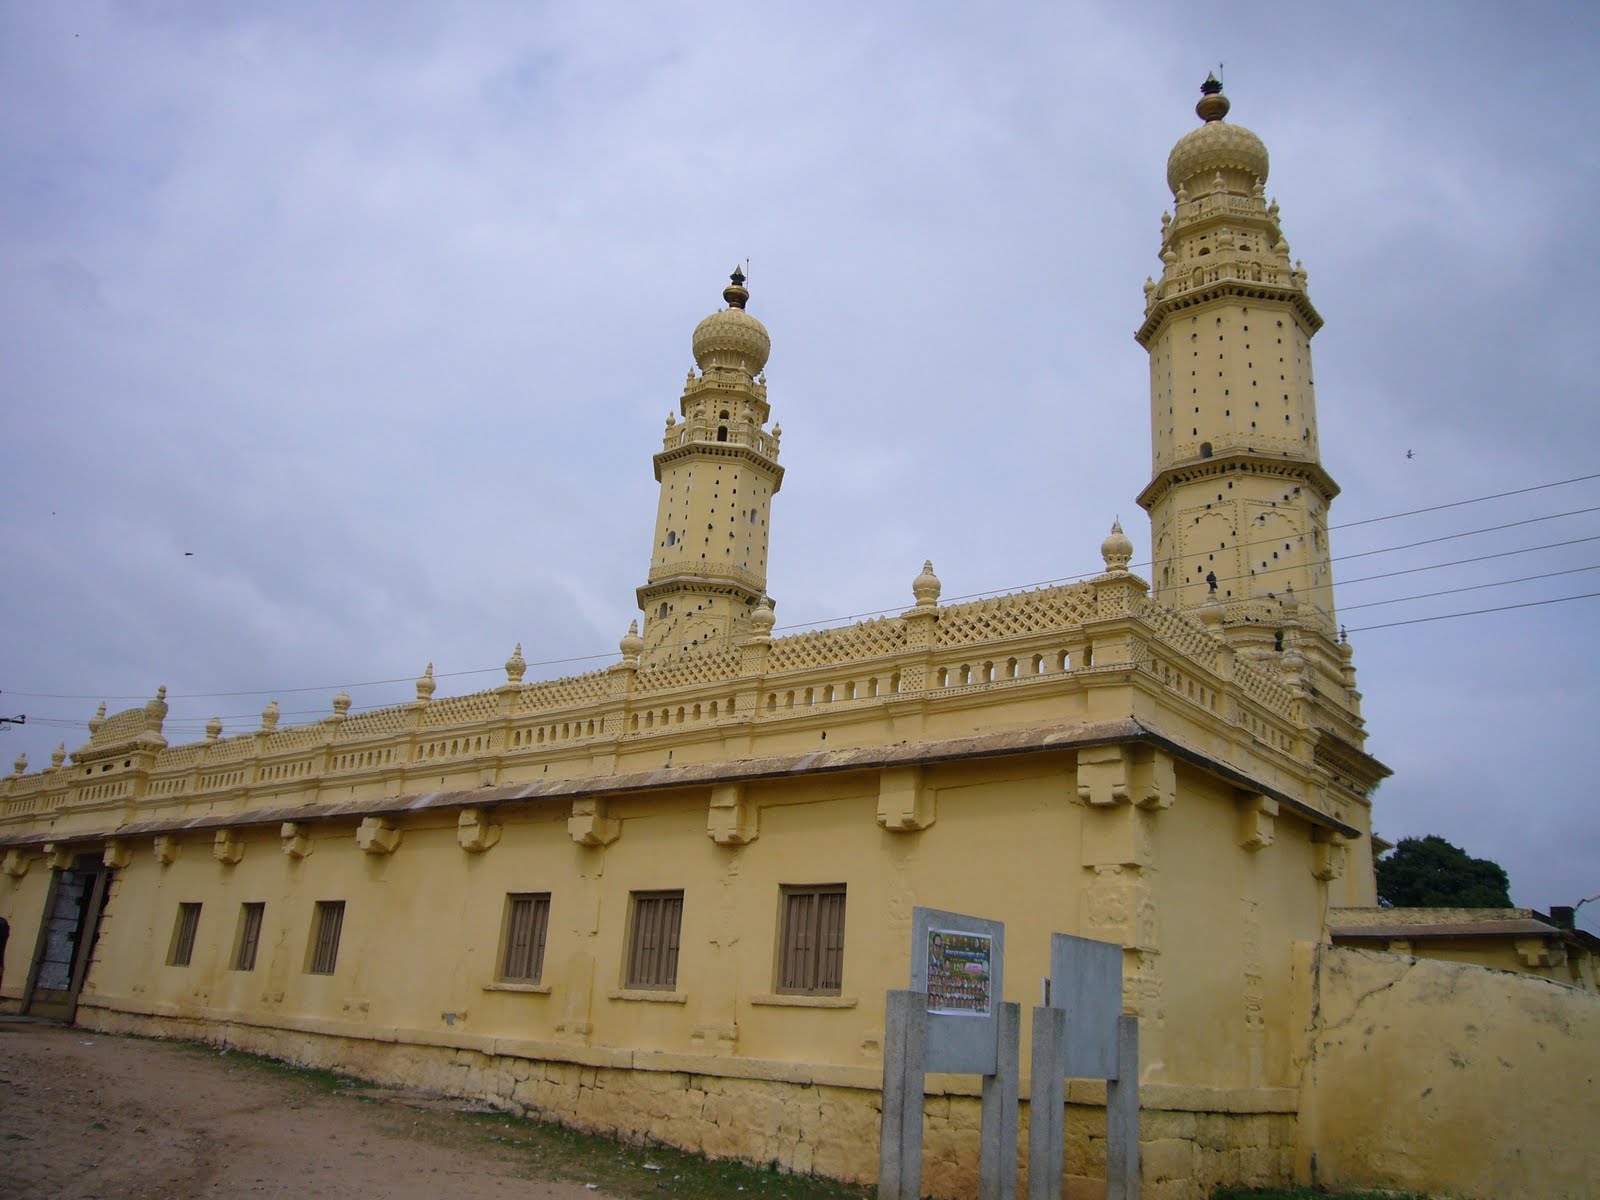
The church in the main square, unchanged since 1811
The main square looking down towards the old bridge. This is where the KGL Light battalions defended the village
Memorial to General Blake

The main bridge at Albuera, as it was in 1811

To get to the battlefield you have to follow the main road (N435) south out of Albuera (making sure not to cross the river), in the direction of Almendral. After about a kilometr, you see a small house on the left and then a small unpaved track leading away from the road to the right. Turning on to this I was able to drive up to the middle of the main battle, about a kilometre in from the main road on a low ridge.

Looking back down eastwards towards modern main road from ridge

Now after about 200 years of farming, it’s hard to tell how much erosion there has been, but to my eye it seemd that the battlefield was largely intact, and I could easily make out the main features compared to contemporary maps.
Looking towards the allied front facing the French attack
 What immediately strikes one is the small area upon which so much of the bloody fighting took place. Indeed, from the front of the allied army’s position on one low rise on top of the main ridge, to the starting point of the French attack atop the second hillock, is only about 300 metres. Again the fronts of the two forces could been at most about 500 metres wide. Considering the thousands of men involved, the ground must have been packed.
The short ground between the start of the French attack and the Allied army line (in the distance)
 The second thing that struck me was the amount of dead ground stretching away from the original right flank of the allies before they turned at the last minute to meet the French onslaught. Even from the top of the ridge where Coles brigade stood, you can only see the top of the hill over which Werle’s brigade appeared. Behind that, the ground over which the French approach is hidden from view. Easy to see the logic of the French, and also to understand the immense task of the allies to turn, face and defend against them after the initial surprise.

Looking along the line of Beresford’s original deployment, the logic seems clear; expecting an attack, he deployed his troops on the reverse slope of a low ridge to avoid unnecessary casualties. I suspect this reduced further the armies’ ability to perceive and react to the flank attack.
Looking north along the Allied armies' first position on the reverse slope of the main ridge. Albuera village in the background.
 The problem of dead ground and blocked sight continued all the way to the line of Colbourne’s approach to the right, affording the Vistula Lancers their chance to get into a position unseen to launch their devastating flank attack; the sudden rainstorm only compounding the blocked line of sight.

Looking east along the Allied armies' liine as it received the French attack from the right (coming down from higher ground, into a dip, before hitting the line)

The line of advance of the French. Taken from the cusp of the small hill facing the Allied army, the land drops away concealing all activity

View of the main French attack from the allied flank. This is where Colbourne's Division was destroyed, and retaken by Myers' and Harvey's brigades
Once Cole’s division and Harvey’s Portuguese brigade came on, the battle played out from these final positions. The land is still sparse, and the soil quite red.


The position of the "Die Hards"

Wednesday, September 28, 2011

Elvas

Recently, on my way to a family holiday in Portugal, I had a few days free before meeting up with relatives. Looking at the map I realised several of the key Peninsular War battlefields could be covered in the short time available. Starting in Lisbon I made straight for the Spanish border and the battlefield of Albuera, stopping the night in Elvas.


Elvas is a short distance from Badajoz,and as such represents one of the two key routes between Spain and Portugal,the other being the Ciudad Rodrigo-Almeida axis in the north of the country. It’s not hard to understand how a majority of the battles and campaigning took place around these sites, as control of both routes could either ensure successful defence of Portugal for the British, prior to any invasion of Spain, or visa versa for the French.

The fortress at Elvas was constructed shortly after Portugal regained her independence from Spain in the 1640’s, and subsequently added to in the following decades. It resembles a classic Vauban fortress, similar in size to it’s the northern fortress of Almeida. This was Wellingtons base for many of the southern campaigns and was never taken by the French. The walls are impressive, and command most of the surrounding countryside. Two hills outside the town walls were also fortified to ensure the towns’ security (both of which still belong to the Portuguese army).


Within the town you can find the British cemetery, containing many graves of soldiers from Wellington’s army, especially a large number of dead from the Battle of Albuera, and a commemoration memorial.

Sunday, July 31, 2011

Seringapatam

Seringapatam (or Srisangapatna as it is now called), was the setting for the final phase of the Fourth Anglo-Mysore war in 1799. Of note is the fact that a younger Arthur Wellesley, the fourth son of an old  Anglo-Irish Family, commanded the rear of the assault on the fortress and later (allegedly) identified the body of the fallen Tipu Sultan (the "Tiger of Mysore"), the ruler of Mysore.

Now work had taken me to India, and I seized the opportunity during a free weekend to drive over from Bangalore to see the old royal city of Mysore. Along the way my driver decided to show me an ancient temple in the midst of an old ruined fortress. It was only when we got to the memorial to Tipu Sultan did I realize we were at the site of the Battle of Seringapatam.

Now the temple itself (Ranganathaswamy Temple) is spectacular, and in good condition considering it's over 1000 years old (I believe it was built in the 9th Century). My driver Shiva was a fairly devout Hindu, so we went in and while he prayed I managed to take a few shots of the beautiful carved figures.


The fortress though is largely a ruin, with only some of the original walls remaining. The pictures below show where the main body of British troops under Major General David Baird stormed the walls after a breach had been opened up by a battery of artillery placed to the south. The ditch and glacis beyond the walls are impressive, and give an indication of the difficulties faced by the assaulting British columns.

Main walls facing south
Main gate facing south towards British Battery position
 Apart from the ancient temple and the fortress ruins, there are the remains of the porticos of a few original buildings from the period as well as the Mosque of Tipu Sultan, who was an Islamic ruler in an Hindu land. The area of the battle itself is undeveloped, and apart from the walls which are mostly in ruin, the battlefield seems to be largely as it was in 1799.

Tipu Sultan's mosque

Wednesday, June 01, 2011

Battle of Jankau - Maps

So, my research for the battle is ongoing as always... Some of the fruits of my digging recently are these nice copies of the battle from Theatrum Europeaum from the University of Augsburg's online document library. I am not aware of any copyright for these images so here they are.

Both images were drawn a number of months after the battle, and it is obvious that the artist (Matthaus the Elder Merian) must have visited the site as they are topographically very accurate (I should know as I walked the battlefield again a few weeks ago).

The first image below is the view of Chapel hill looking over the battlefield on the day before the battle. As we can see both the Swedish and Imperial armies kindly burnt down a number of the local villages during their respective marches, and the Swedes are alleged to have pillaged and burnt down the rest after the battle (according to local folklore the area was almost uninhabited for a few decades after 1645).


The second picture shows the closing stages of the battle as the Swedes pushed through the Hartmany wood. It actually captures a number of phases at the end, including the final unexpected Swedish attack as the light was falling, the capture of Hatzfeld and the rout of the Imperial army.


There were a total of five pictures of the battle, and the order of battle in Theatrum Europeaum, indicating the contemporary importance of the battle. The vantage point of the second picture was probably in the vicinity of the village of Nosakov, looking north to Jankov and Ratemerice.

Monday, May 30, 2011

Battle of Blenheim / Blindheim 1704


The advantage of Prague as a city of residence is the easy reach of many famous battlefields, and equally fine military museums both in Bohemia, and neighbouring lands. Thus on a recent trip with a good friend from Cork, I managed to get to the Blenheim battlefield. Now admittedly  this is not exactly a quick drive from Prague (it took 4 hours)), and it was taken in during a short tour around Bavaria.

Below is the original Blindheim church where the French right wing under  Clérambault were surrounded and eventually surrendered. The Danube river originally flowed quite near to the village, initially providing the French with a natural flank, against which they were eventually trapped. The course of the river has since moved considerably to the South-east


Apart from a slight sprawl from the village of Blindheim, the battlefield is largely intact. Stretching four odd miles or so from the hills of the Swabisch Jura to the Danube, the topography is fairly flat. The picture below is by the Nebel, looking North-east towards the British centre (and in the distance the village of Wolperstten

Running through the middle of the battlefield, is the Nebel, which is now nothing more than a small stream and ditch, though which at the time of the battle was a wider, and much marshier large stream.


The pictures were taken from Marlborough's centre, where he launched his main attack against the weak dividing point between the French and Bavarian wings of the Franco-Bavarian Army. Below is the view from the British centre towards the French left wing. The village of Blindheim has grown a fair bit to the north since the days of the battle, and where the houses are now would have been open fields. The original Blindheim church (which is pictured above), can be seen in the distance on the left of the photograph.

Unfortunately we didn't have time to visit the museum in Hochstadt, where there is an excellent diorama of the battle. You can see it here:

http://en.wikipedia.org/wiki/Image:Battle_of_Blenheim_Diorama.jpg

Salute 2011

Well, the last month has been been quite hectic, what with a new job, travel and many other drastic changes to my routine. Anyway, luckily I managed to get myself over to London for the annual Salute show. Now allot has already been written and photos published on other sites and blogs, so I will not try to replicate anything here other than some personal highlights and the odd picture from some games which I found inspiring.

So, it was my first visit to this show, and the first visit to a large wargames show for a few years since I made it up to Crisis in Antwerp with the rest of the Prague Wargames Club to put on an exhibition game (it was a modest Great Northern War presentation in 10mm). Needless to say the place was packed to the gills. I'd got an advance ticket which seemed to get me in a bit ahead of the other crowds.

The quality of games encountered was very high indeed.  For terrain and overall effect the favourite had to be the huge diorama/game/presentation of the Battle of Gallipoli by Battlefront. Hats of to the gentlemen who designed it.

 
A close second had to be the large alternative English Civil War Siege of Worcester by a Club from Crewe and Nantwich. A couple of ghoulish public execution vignettes set the scene for the period.


My third favourite had to be the Lance and Longbow Society's presentation game of Verneuil 1424. I found the modelling on the buildings and fortifications to be first rate.


As usual, I left the show weighed down by a tonne of AWI lead from the Perry brothers stand (very nice people I have to say; friendly and extremely helpful).

I also managed to swing by the Pike and Shot Society's stand, and spent a good hour talking to Neil Ronnaldson, and drooled over all those splendid books by Robert Hall et al. Oh, and much fun was had at the Too Fat Lardies table (I highly recommend their Sharpe Practice rules).


Sunday, April 03, 2011

Battle of Jankau (Jankov, Jankow) 1645


So a taster of things to come. Spring finally sprung in Bohemia, and myself and Wife decided to decamp from Prague for the day and visit the family country cottage down south (it’s called “chalupa” in Czech). Now for a history buff like myself, it’s an absolute joy as it stands right in the middle of the battlefield of Jankov (Jankow, Jankau), allegedly the bloodiest battle of the Thirty years War, where the Swedish Army under Tortenson, annihilated the main Imperial army (including all the Bavarian cavalry) under Hatzfeld. The dramatic change in strategic strength of the Swedes vis-à-vis the Hapsburgs certainly helped set in motion renewed efforts to end the conflict, which concluded with the Treaty and Peace of Westphalia three years later in 1648.

Our route took us along the first phase of the battle from Broumovice, along the road parallel to "Chapel Hill", towards Ceckov and past where the main body of fighting in the first phase of the battle took place in Nosakov, and the hill where the Swedes stationed their large artillery train. (The picture above is of Jankov in the distance from the flanking route of the Swedish Army. The picture below is looking up towards "Chapel Hill" where the first early morning encounter occured).


The Swedes attempted what was probably one of the first flank marches in early modern warfare. Seeking a way around the Imperial left wing the Swedes came down from the ridge to the west of Jankow, and followed a South-Easterly route concealed by a number of low lying ridges and forests. Unfortunately for them they crashed into Imperial pickets stationed far to the south of the Imperial left flank. The Imperials alerted, began to change position to meet the early morning attack and the battle was begun.

Below, from a point on the Swedish Flanking march, looking towards Jankov to the North-East. The dark area on the middle horizon is the Hartmany forest. In 1645 this would have been much larger. This is where the main Swedish and Imperial forces crashed into each other by mid morning, and where half the fighting took place (phase 2 as marked on the map above). The Imperials then retired to a final position on a low ridge just behind Jankov village.


As the area has never really been developed, the battlfield is almost intact, and also makes for an excellent cycling trip.I will be paying a longer visit to Jankov in the coming weeks, and will provide a more detailed photo journal.